In this article, we will discuss the overview of DHCP and will focus to implement How to Configure DHCP Server on a Cisco Router step by step. Let’s discuss it one by one.
Overview :
DHCP (Dynamic Host Configuration Protocol) configuration is performed on routers to assign an IP address, subnet mask, gateway address ad DNS server address to the host systems. With this configuration, the dynamic IP address is assigned, which enables the administrator to easily connect a new host in the configured network.
How to Configure DHCP Server on a Cisco Router :
Steps are provided below, which can be followed to configure DHCP on the Cisco Router to assign a dynamic IP address to host systems deployed in the network:
Step-1 :
A network topology is created in the Cisco Packet Tracer, which includes a router, a switch, and three host systems connected to a network.

Step-2 :
Command Line Interface of the router is accessed and high-lighted commands are executed to successfully configure the DHCP. At first, the ‘IP DHCP pool pool_name’ command is executed. After this, the network address is defined along with its subnet mask. And further, the ‘default-router IP-address’ command is used to define the default route address.

Creation of DHCP pool
Step-3 :
In this step, a range of IP addresses is excluded from the addresses defined in the subnet mask of the DHCP pool. Excluded IP addresses will be not assigned to any host system in the network.

Command used to exclude IP range
Step-4 :
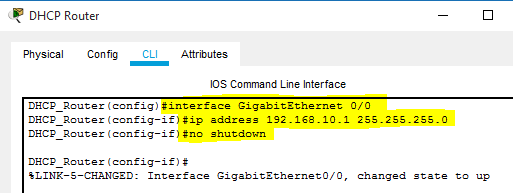
The interface of the router connected with the switch is assigned with the IP address defined as the default router during the DHCP configuration. This route will be taken by the data packets to reach their destination system. Also, the ‘no shutdown command is used to change the state of the connected interface to up.

Assigning of IP address to router’s interface
Step-5 :
A successful connection is established between all the devices connected in a network. In further steps, host systems in the network are assigned with dynamic IP and default gateway address by the DHCP service configured on the router.

All the devices are successfully connected
Step-6 :
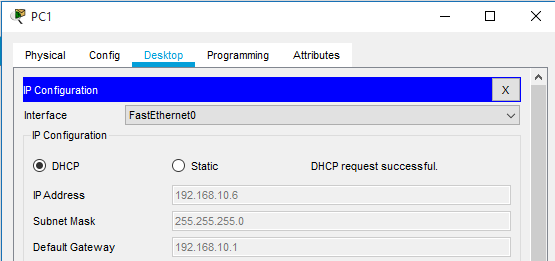
Desktop settings of a host system are accessed and the DHCP option is selected. DHCP request forwarded by the system is acknowledged and IP address, associated subnet mask, and default gateway address are assigned to it.

The dynamic IP address assigned to the Host System
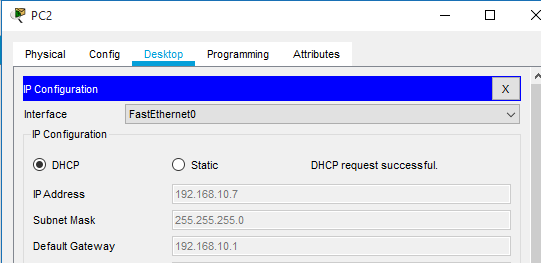
Another host system deployed in the network is assigned with required logical addresses through the DHCP server configured on Cisco Router. In addition, IP addresses defined in the excluded range are not assigned to the computer systems.

Logical addresses are assigned to the Host System
Step-7 :
To check the connectivity between the host systems, the ‘ping’ command is used to exchange data packets. All the data packets are successfully transferred, which ensures that a communication channel is established.